ng --version
> SuiteCRM 8 Guide > Developer Guide > Extensions > Front-end > Getting started with frontend extension development
Getting started with frontend extension development
The following documentation is for SuiteCRM Version 8+; to see documentation for Version 7, click here.
The following documentation assumes that you have good understanding of angular framework
1. Intro
The following guide provides an explanation on how to get started with frontend extensions using the default extension that comes with SuiteCRM since version 8.3.0.
This base extension should have everything you need to get started and also provides a base structure for your frontend customizations.
If you do not want to use a default extension you can create one from scratch by copying and renaming the default extension. To find out what you need to replace please look into the Frontend Extension Setup guide, which explains how to setup a frontend extension from scratch
The following steps assume that you have a SuiteCRM-8.3.0 or greater installed and have an intact default extension under extensions/default
1.1 Development package
The following steps assume that you have used the dev package, e.g. SuiteCRM-8.3.0-dev.zip, to install your crm. This dev package can be found on the github release, please check the release notes.
This package is meant to help in the development of frontend extensions.
The only difference between the base package and the dev package, is that the dev package includes the dist folder.
Including the dist folder should remove the need to rebuild the core frontend code.
Please have a look at the Developer Install Guide you want to rebuild the full core frontend.
2. Setup
2.1 System requirements
Please make sure you have the same versions as the ones described on this section
Before you can start building extensions you first need to install the following software:
-
npm
-
yarn
-
ng cli
Go to the Compatibility Matrix page and check the specific versions under the Additional requirements for Development section for the SuiteCRM version you are using.
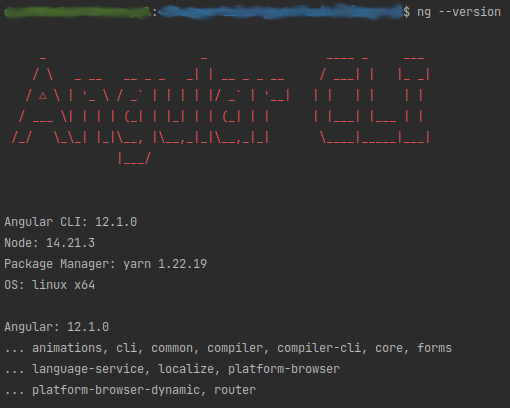
After installing everything, open a terminal on the SuiteCRM folder and run:
You should have an output similar to the following (except for the versions, that may change depending on the SuiteCRM version you are using):
2.2. Install dependencies
You only need to do this step once. After the dependencies are installed you should only need to run it again after upgrading to a new SuiteCRM version
Now that the base system requirements are setup, you need to install the needed dependencies (node modules).
Go to your SuiteCRM folder on the terminal and run:
yarn install2.3. Build the default extension
Let’s try a first build of our extension to make sure everything is working.
Go to your SuiteCRM folder on the terminal and run:
yarn run build-dev:defaultAfter the command ends some files should have been generated to public/extensions/default.
2.4. Enable your extension
On the base package the default extension is disabled by default. You need to enable it for it to be known to the frontend as an extension that is available to load.
To enable the default extension open the following file on any code editor:
extensions/default/config/extension.phpThen change enabled to true 'enabled' ⇒ true,. The file should look something like the following:
<?php

use Symfony\Component\DependencyInjection\Container;

if (!isset($container)) {
    return;
}

/** @var Container $container */
$extensions = $container->getParameter('extensions') ?? [];

$extensions['default'] = [
    'remoteEntry' => './extensions/default/remoteEntry.js',
    'remoteName' => 'default',
    'enabled' => true,
    'extension_name' => 'Default',
    'extension_uri' =>  'https://suitecrm.com',
    'description' => 'An example Extension template or for simple instance customisations',
    'version' =>  '1.0.0',
    'author' =>  'SalesAgility',
    'author_uri' =>  'https://www.salesagility.com',
    'license' =>  'GPL3'
];

$container->setParameter('extensions', $extensions);
2.5. Extension ready for development
With the above steps you are now ready to start developing frontend extensions
3. Development and production builds
3.1 Development build
To run a dev build you can run:
yarn run build-dev:defaultThis command will build the default extension in a non-production mode.
Plus it will generate the files directly to the public/extensions/default folder. Which allows you to also use the --watch option.
Thus when developing it is best to run:
yarn run build-dev:default --watchThe command will stay on "watch" for changes to the files in the extension. It will automatically re-rebuild after code changes.
See Default package dev build setup for more info on how it works.
3.2 Production build
To run a production build you can run:
yarn run build:defaultThis command will build the default extension in a production mode.
See Default package production build setup for more info on how it works.